Vinyl flooring is easy to install, slip resistant, durable and affordable. It is the most popular floor now. But over time, it will still show signs of aging and damage. If your vinyl floor is out of date or broken, you will still want to remove it. At this time, you will want to remove it as quickly and easily as possible.
This is why we are here today! We will show you how to remove vinyl flooring(both vinyl sheet and luxury vinyl tile) step by step. We’ll share some top tips for getting good results.
Here are 6 easy steps to remove vinyl flooring.
It’s an in-depth article that takes 30 minutes to read.
Navigation, click to jump to the section you want to read
Work Gloves
Knee Pads
Screwdriver
Hammer
Pry Bar
Trim Puller
Floor Scraper
Utility Knife
Utility Snips
Pencil
Heat Gum
Broom or Vacuum Cleaner
Vinyl flooring produced before the 1980s may contain asbestos. If so, you need to hire a licensed contractor to get rid of it.
Yes, it’s a cost and trouble, but it’s inevitable. Don’t try to take shortcuts and do it yourself. Your health will face very serious risks. Exposure to asbestos can lead to invasive cancer, which is fatal.
In some cases, you can lay new floors on existing asbestos containing floors. But you still need to consult a licensed asbestos expert first. Even this method carries the risk of interference with asbestos fibers.
Assuming that your vinyl flooring subfloor does not contain asbestos, you can remove it yourself. So clean up the furniture in the room and make room for yourself to work.
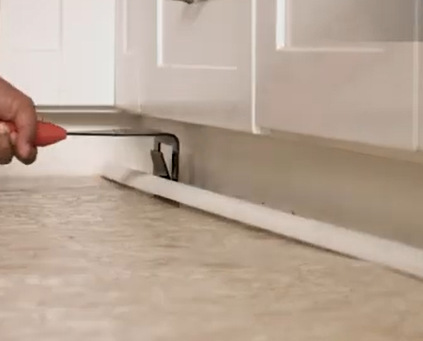
Some floors will have a quarter-round molding to cover the space between the floor and the baseboards. If your vinyl floor has this, use your pry bar to pull it out.
Once done, remove the baseboards. These will mostly be installed over the flooring and you must pull them out before starting on the flooring.
To get started, place a block of wood against the wall, two to three inches above the trim you intend to remove. Next, insert the pry bar between the trim and the wall.
Pry the boards systematically, starting from one corner of the wall to the next. Go slowly to avoid snapping them. Even if you don’t plan on using them again, pulling them out in full lengths will still be easier than pulling small, broken pieces.
Most of the time, when installing vinyl flooring, it will be glued just around its perimeter, which makes it much easier to remove. In other words, only about five-inch perimeter is glued down. The middle part of the floor lays loose.
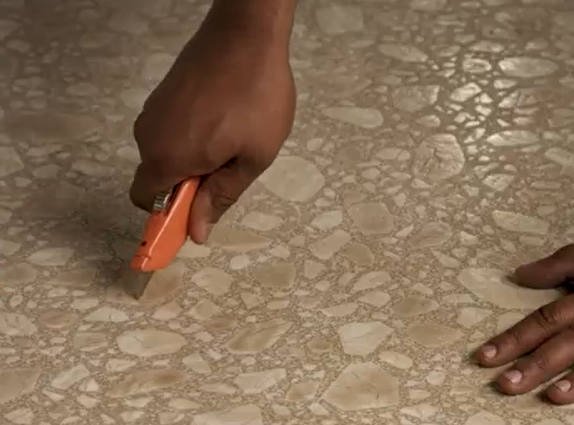
Using a utility knife, cut around the flooring about seven inches away from each wall, making sure the cut stays parallel to the walls. Do not cut too deep, or you will gouge your wood floor underneath. Now, try pulling up the middle part of your vinyl flooring and see if it comes out easily.
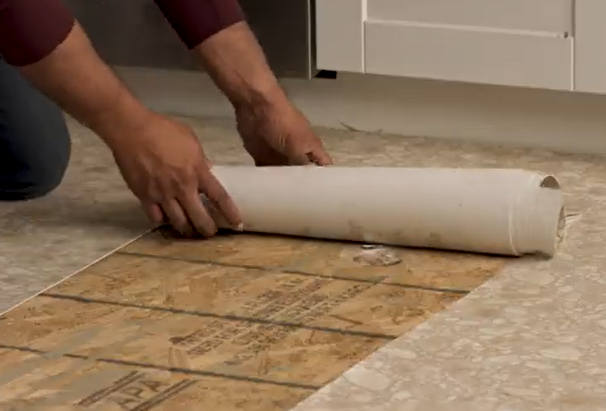
If you are working on a large floor, consider cutting the floor into long, narrow strips to make it more manageable. A fifteen-inch strip of flooring, for instance, will be much easier to pull off than, say, a four-foot sheet. Narrow strips will also be much easier to dispose of than larger sheets.
There is no need to keep your floor in larger sheets unless you intend to use it again or give it to someone. Sure, rolling up or pulling back larger sheets can be tempting, but when sheet vinyl become heavy, they will be too difficult to manage.
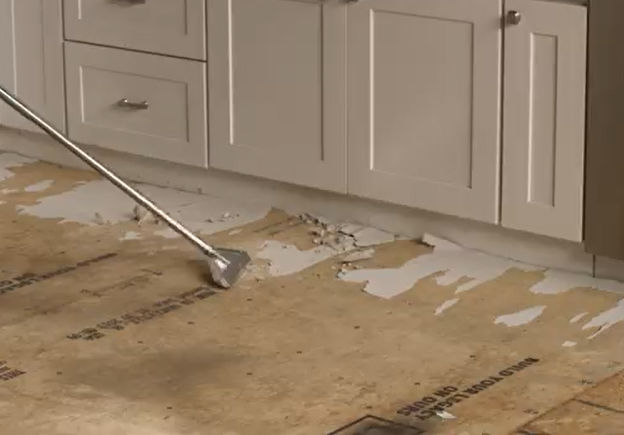
For any glued down vinyl plank to come out of the floor, you will need to scrape it off. Start by prying the flooring and scraping under it to detach it from the subfloor. Hold your scraper at a 45° angle to avoid chipping the wood.
For the most part, only the flooring will come out at this time. Depending on how you are holding your scraper, some of the glue may come out too, but mostly, the scraper will only loosen the flooring. Work in small sections, pushing the scraping tool in short thrusts until you have removed all the flooring. Use your free hand to peel back the flooring,
If you are removing an old floor, you will find that the scraper chips away at the adhesive relatively easily.
Once all your vinyl plank is gone, you’ll probably find you have patches of glue all over your sub-floor. Use your scraper to remove this.
If it’s very difficult, you can make your life easier by softening up the glue.
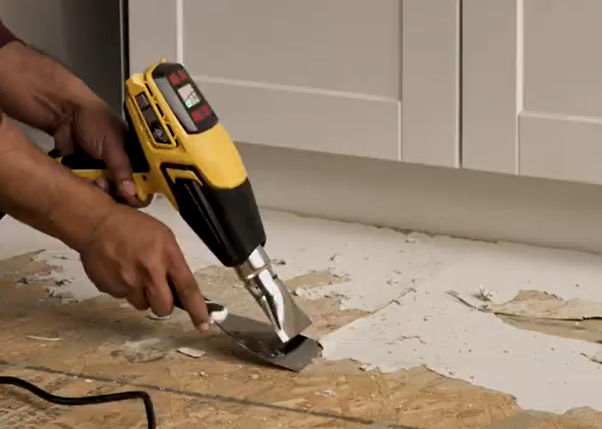
Heating will help soften the hard adhesive and make it much easier to remove. To start, turn your heat gun on low and wait until it sufficiently heats up.
Then, hold it over the adhesive, about three and a half inches away from the floor. Do not let the heat gun touch the adhesive.
Now, grab your scraper and scrape off the softened glue, using short thrusts. Again, work the tool at 45° so you don’t scratch or dent the wood flooring.
Scrape small sections of the floor at a time. If the scraper stops moving through the adhesive easily, stop to reheat and loosen the adhesive. Depending on how hard the glue is, you may need to pass the heat gun over it several times to completely get rid of it.
Now all the vinyl flooring and glue has been removed, you’re almost ready to lay your new floor. But before you do that, you’ll need to clean up any dirt, dust and small fragments of glue and vinyl.
The simplest way to do that is with a good old vacuum cleaner. Put it on the hard floor setting and cover the whole area. If you have a nozzle, use that to clean right to the edges. If you don’t, it’s a good idea to use a dustpan and brush to make sure you get rid of all the debris.

This article is written by Longda Flooring (www.longdaflooring.com), a leading vinyl sheet flooring manufacturer from China.
Please contact Longda flooring for a free quote on your vinyl flooring needs. We have quick response, efficient communication, quality products, on time delivery, and competitive price.
Copy right by Longda China